Install
- Download maratisExporter (for Blender 2.5+ or Blender 2.6+) : DON’T UNZIP FILE
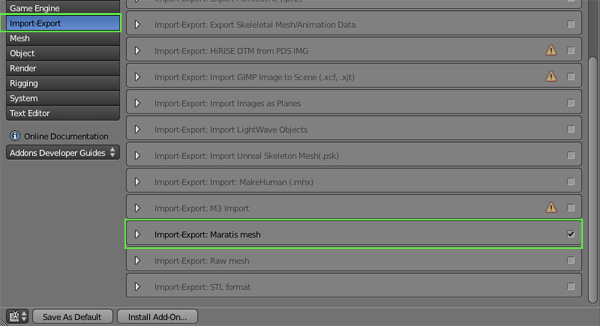
- Start Blender and go to File > User Preferences > Add-Ons > Install Add-On
- Select maratisExporter.zip and check Import-Export: Maratis mesh
- Save As Default
_
Maratis mode
Select Maratis in the Blender Render menu, it will enable special panels for Maratis.
_
Maratis Materials
[IMPORTANT : only the green boxed in areas are supported]
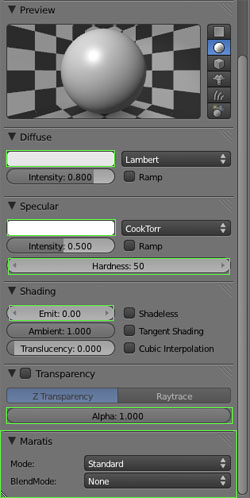
Maratis materials are a bit different than Blender materials, only some features are supported (see the green boxes) and they are real-time oriented.
An additional panel is visible in the Material properties :

You can choose between 3 modes for Maratis materials :
Fixed is used for old generation 3d using multi-texture only (mostly deprecated today).
Standard is the simplest mode, it creates a classic material using diffuse, specular, normal-map and emit.
CustomShader is the mode to select if you want the material to use a specific glsl shader, shader samples here.
The Blend-mode specify what type of transparency is applied to the material.
_
_
- Texture slots :
If you are using a Standard material, the texture slots needs to be used in this order :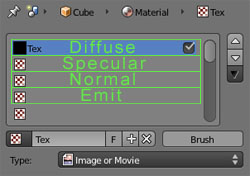
The only Type supported is Image or Movie
(though movies are not supported yet)
_
_
_
_
_
If you are using a Fixed or CustomShader material, you can use up to 8 texture slots :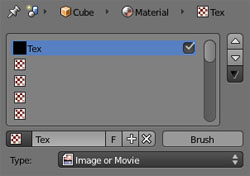
In glsl, texture slots are accessed using :
uniform sampler2D Texture[8];
_
_
_
_
_
_
_
_
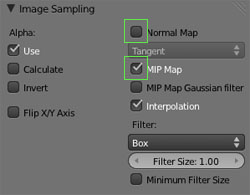
- Supported Image sampling :
_
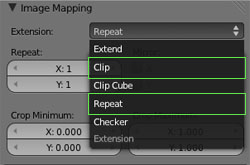
- Supported Image mapping :
_
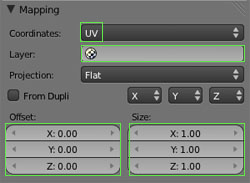
- Supported Mapping :
_
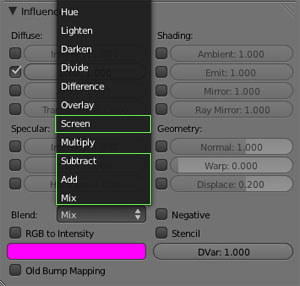
- Supported Influences
(only active in Fixed mode for multi-texturing blending)
_
Skinning
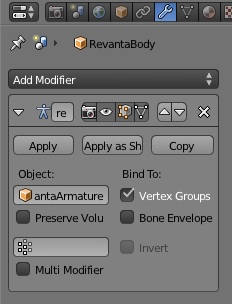
Maratis only supports Vertex Groups skinning :
be sure to turn off the Bone Envelope option.
If you don’t want to do the skinning manually :
- select your model, then select the armature
_(both need to be selected)
- go to Object > Parent > with Automatic Weights
> select ‘With automatic Weights’
_
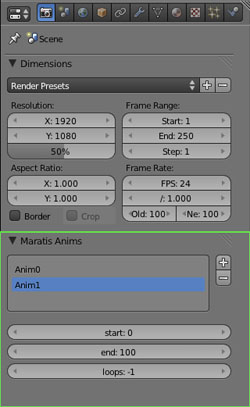
Animation and multi-animation
_
Export
Select the objects you want to export and go to File > Export > Maratis mesh
(Don’t forget to select the Armature(s) with the Object(s))
_
Things to keep in mind
In general :
- Be sure your textures are in Your-Maratis-Project/maps/
- Export the meshs to Your-Maratis-Project/meshs/
- 10 units is equal to 1 meter
- Use 60 fps frame rate in Blender for animation
For large objects :
When working on large objects, like a full level with multiple rooms, try to separate the mesh in multiple Blender objects (for example, one for each room). When exported in Maratis mesh format, each object will become a SubMesh.
Why ?
- For a better visibility detection (only visible SubMesh will be draw)
- For more dynamic lights. Maratis standard renderer only uses the 4 closest lights of each SubMesh.

